As was described in last section, there are diluted solid samples, which can be prepared onto big substrates or concentrate solid samples which have to be prepared in
thin films . Both methods are following described.
Liquid and gases samples can also be measured, but the preparation of those kind of sample is not discussed in this paper because it depends in the specific requirements of each sample. Several designs can be used as long they avoid the escape of the sample and the material used as container does not absorb radiation at the energies used for the measure.
Method 1
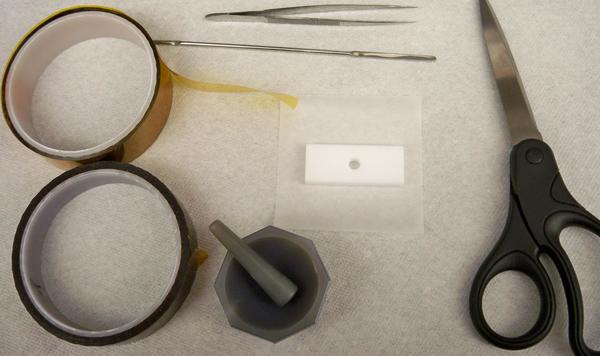
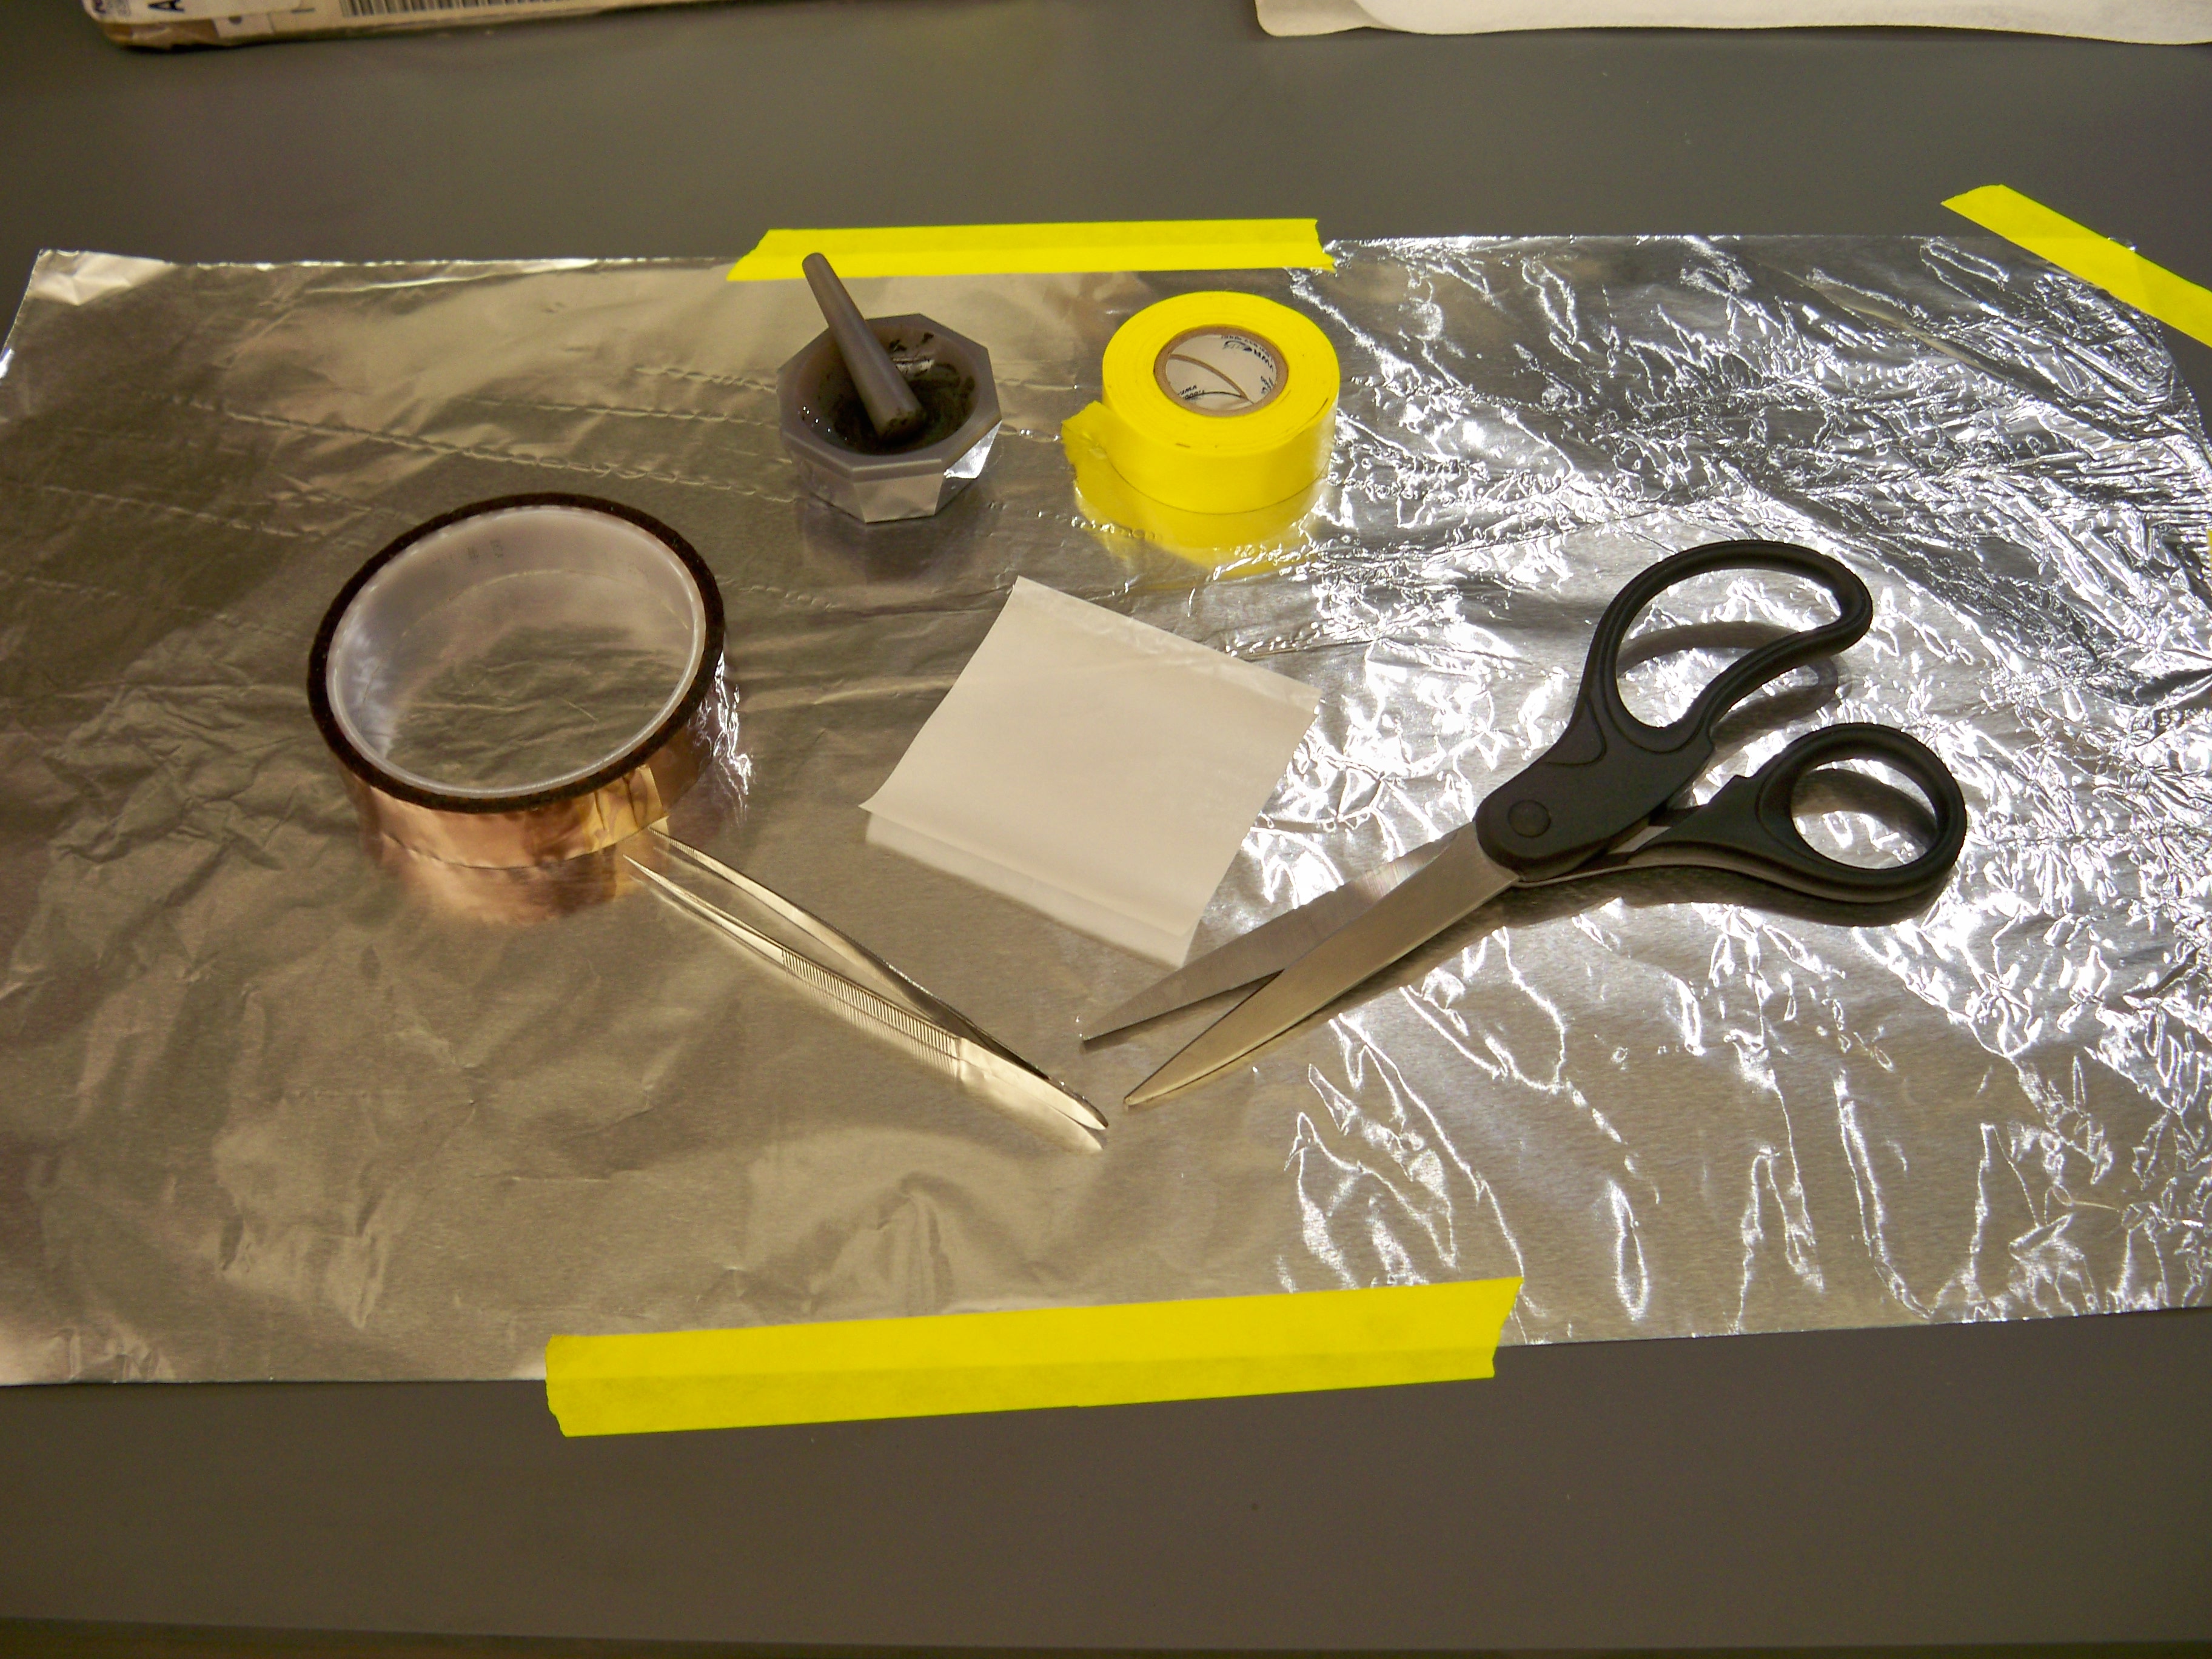
The materials needed are showed in
[link] : Kapton tape and film, a thin spatula, tweezers, scissors, weigh paper, mortar and pestle, and a sample holder. The sample holder can be made from several materials, as polypropylene, polycarbonate or Teflon.
Several tools are needed for the sample preparation using Method 1.
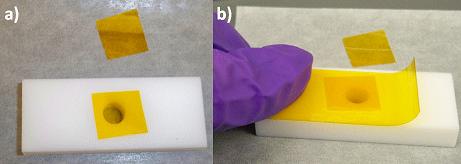
Two small squares of Kapton film are cut. One of them is placed onto the hole of the sample holder as shown
[link] a. A piece of Kapton tape is placed onto the sample holder trying to minimize any air burble onto the surface and keeping the film as was previously placed
[link] b. A side of the sample holder is now sealed in order to fill the hole (
[link] ).
Preparing one face of the sample holder by (a) positioning a small piece of Kapton film onto the hole, which is held in place by Kapton tape (b).The side of the sample holder is closed.
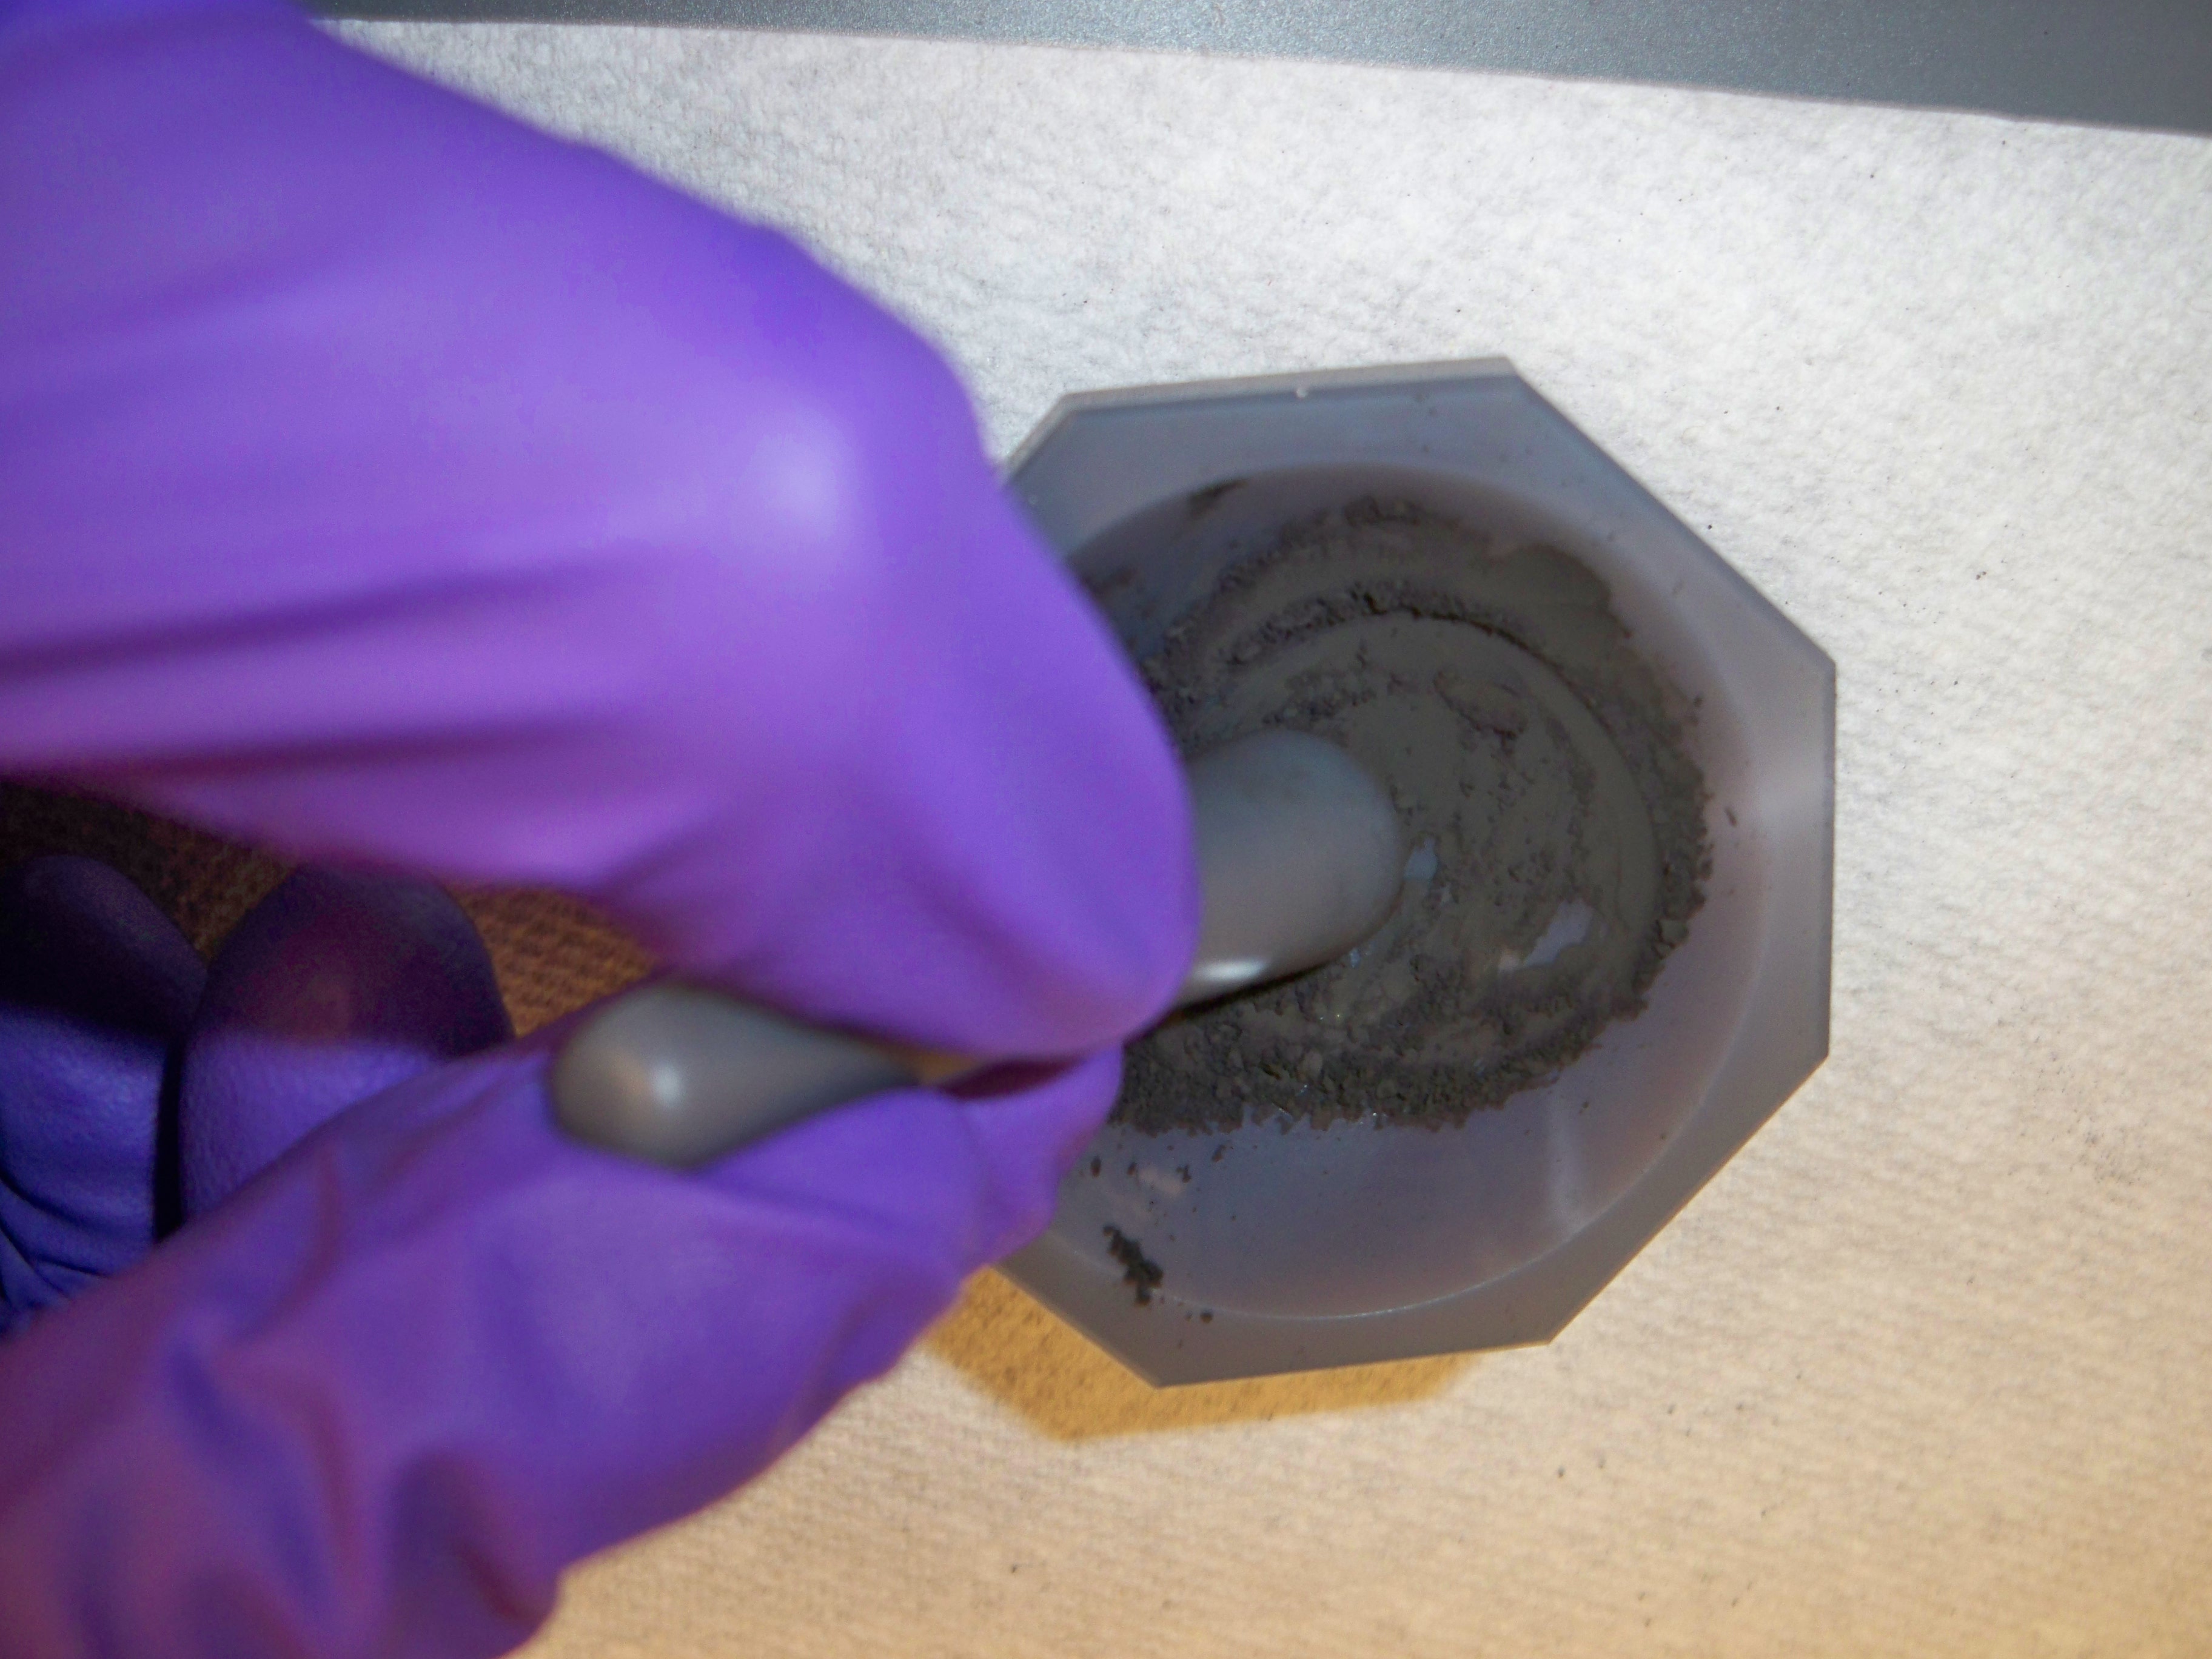
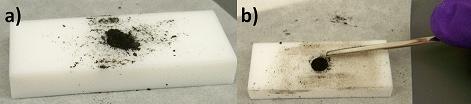
Before fill the sample holder, make sure your sample is a fine powder. Use the mortar to grind the sample (
[link] ).
The sample is ground to be sure the grain size of the sample is homogeneous and small enough.
Fill the hole with the powder. Make sure you have extra powder onto the hole (
[link] a). With the spatula press the powder. The sample has to be as compact as possible (
[link] b).
The sample holder is filled by (a) adding extra powder onto the hole then (b) compacting the sample with the spatula.
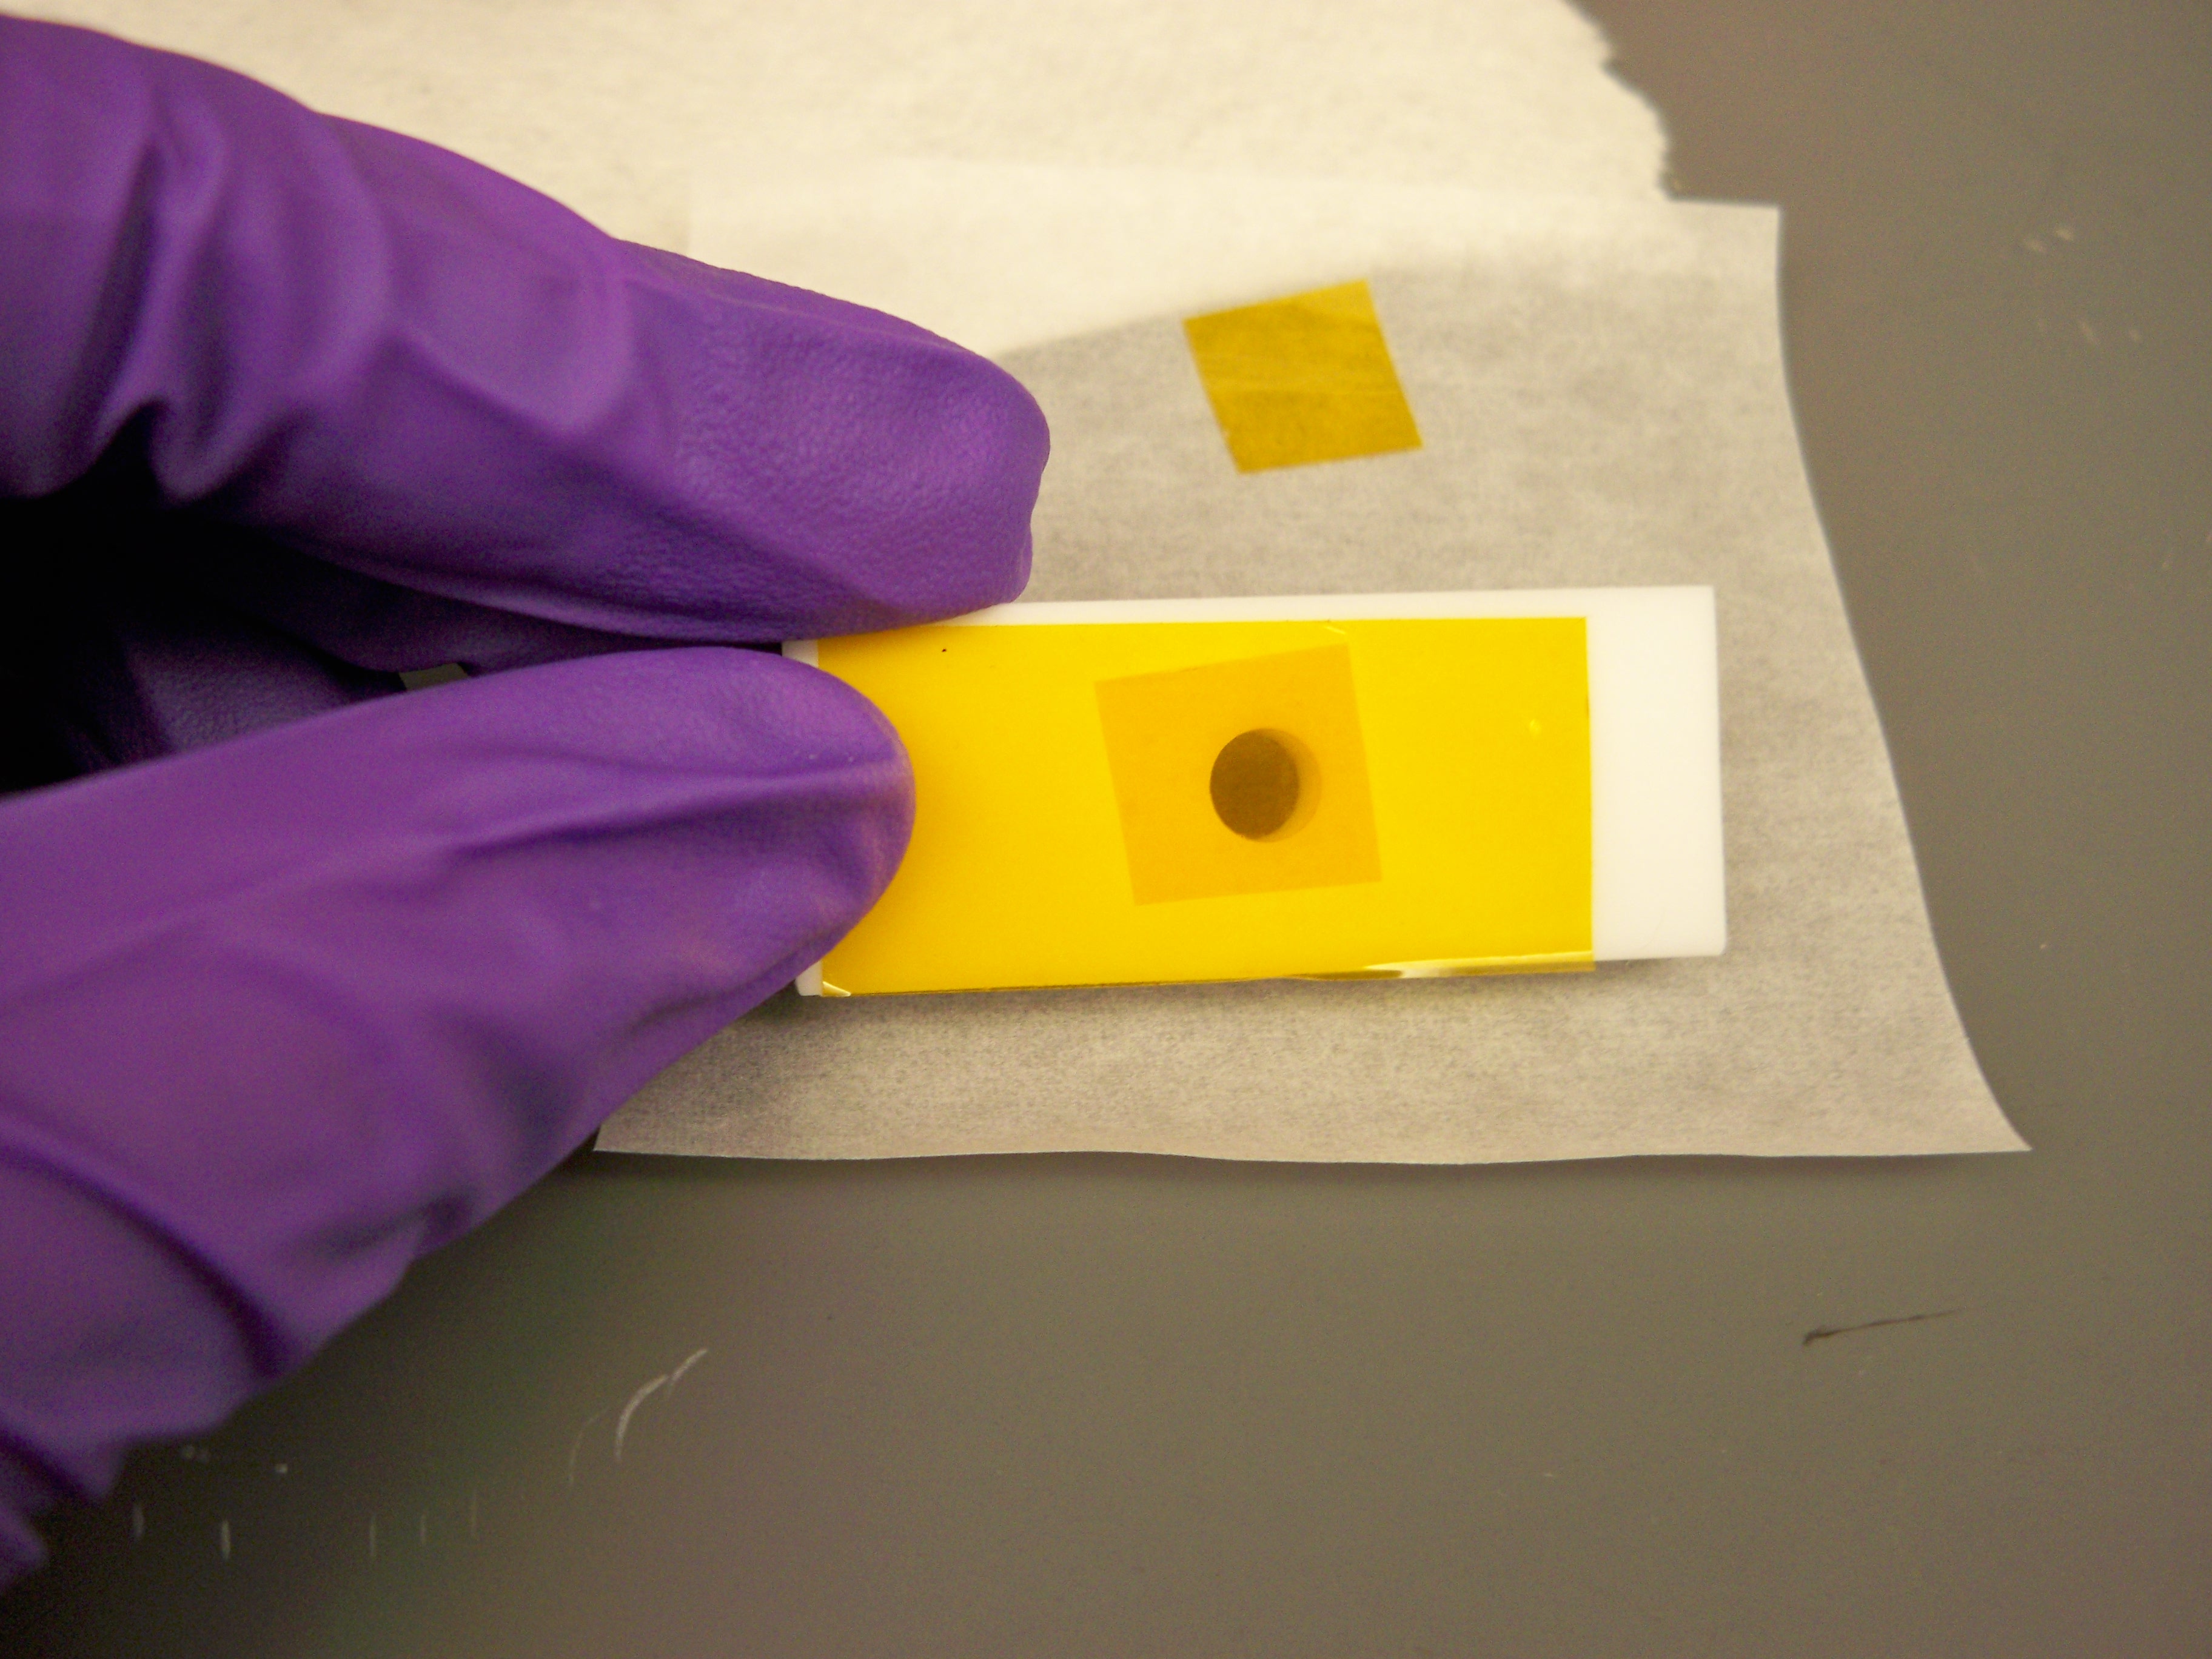
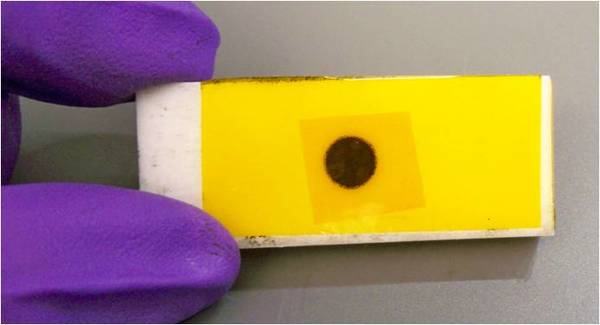
Clean the surface of the slide. Repeat the step 2. Your sample loaded in the sample holder should look as
[link] .
Sample loaded and sealed into the sample holder.
Method 2
The materials needed are showed in
[link] : Kapton tape, tweezers, scissors, weigh paper, mortar and pestle, tape and aluminum foil.
Several utensils are needed for the sample preparation using Method 2.
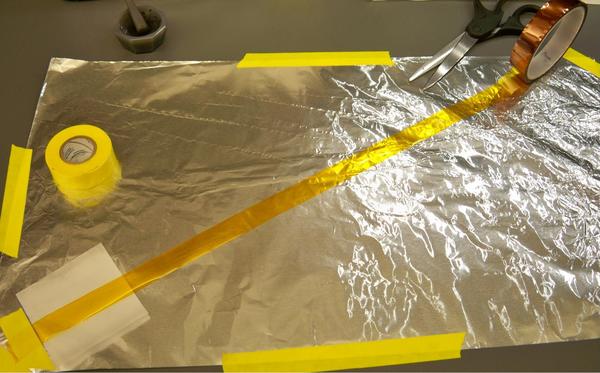
Aluminum foil is placed as the work-area base. Kapton tape is place from one corner to the opposite one as shown
[link] . Tape is put onto the extremes to fix it. In this case yellow tape was used in order to show where the tape should be placed but is better use Scotch invisible tape for the following steps.
Preparation of the work-area.
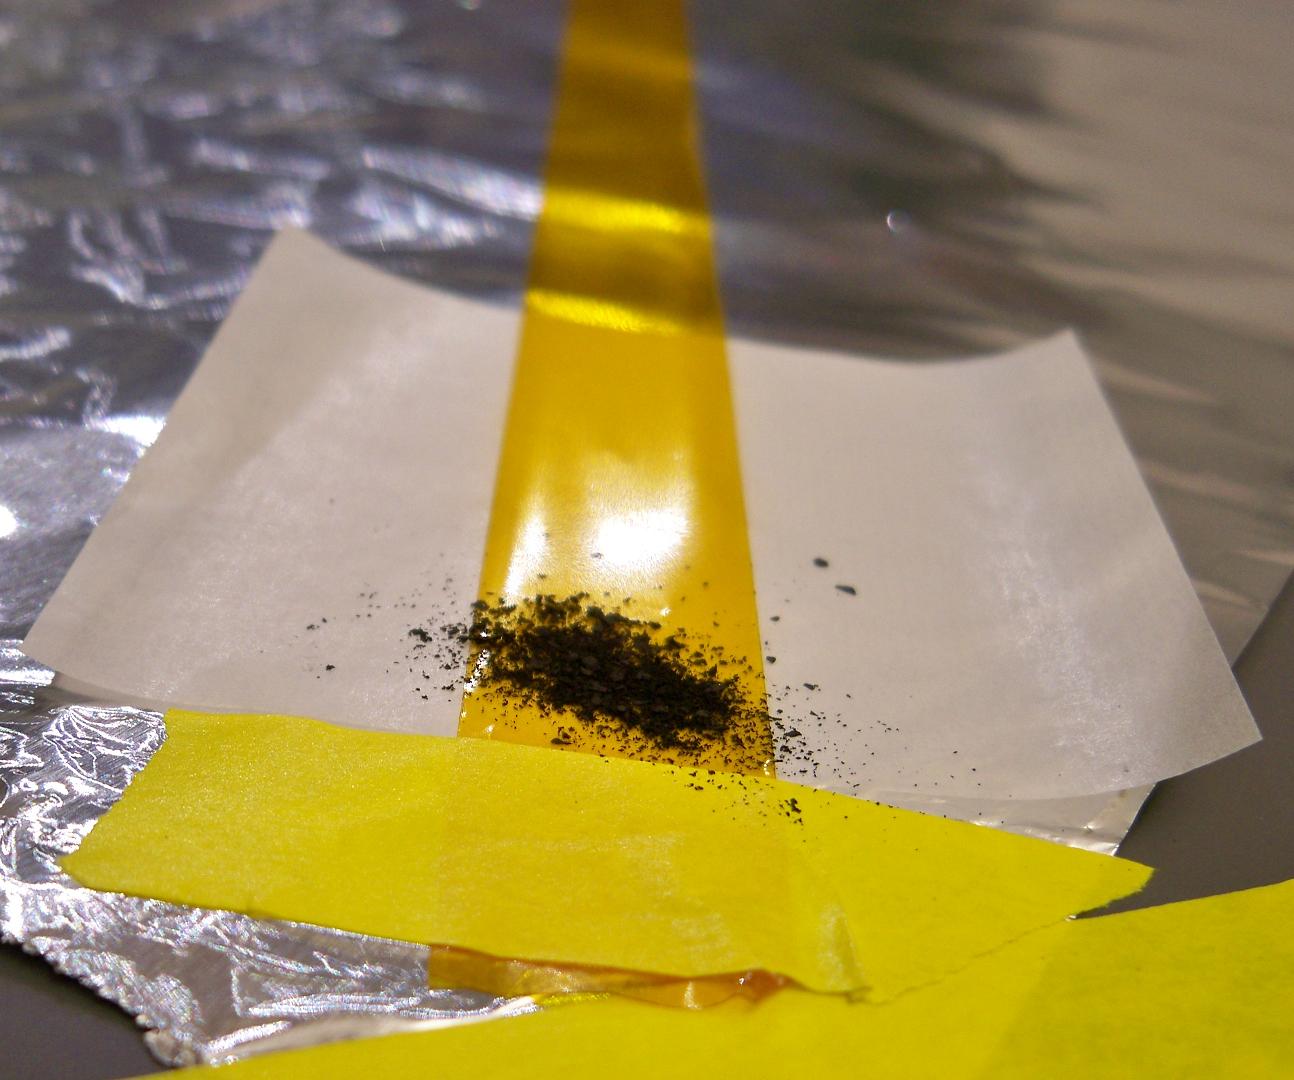
The weigh paper is placed under the Kapton tape in one of the extremes. Sample is added onto that Kapton tape extreme (
[link] ). The function of the weigh paper is further recuperation of extra sample.
Add the sample onto an extreme of the Kapton tape.
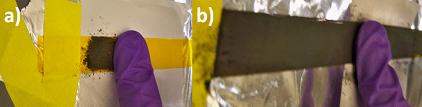
With one finger, the sample is dispersed along the Kapton tape, always in the same direction and taking care that the weigh paper is under the tape area is being used (
[link] a). The finger should be slid several times making pressure in order to have a homogeneous and complete cover film (
[link] b).
Making a thin film with a solid sample by (a) dispersing the solid along the Kapton tape and (b) repeated sliding several times to obtain a homogeneous film.
The final sample covered Kapton tape should look like
[link] . Cut the extremes in order to a further manipulation of the film.
A complete thin film.
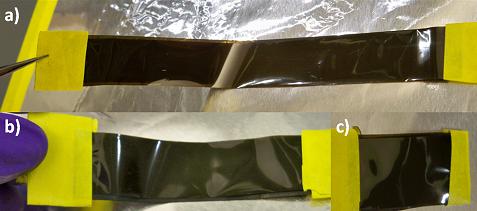
Using the tweezers, fold the film taking care that is well aligned and there fold is complete plane.
[link] a shows the first folding, generating a 2 layers film.
[link] b and
[link] c shows the second and third folding, obtaining a 4 and 8 layers film. Sometimes a 4 layers film is good enough. You always can fold again to obtain bigger signal intensity.
Folding of the thin film simple once results in a two layer film (a) and after a second and third folding four and eight layers films are obtained (b and c, respectively).
Bibliography
B. D. Cullity and S. R. Stock.
Elements of X-ray Diffraction , Prentice Hall, Upper Saddle River (2001).
F. Hippert, E. Geissler, J. L. Hodeau, E. Lelièvre-Berna, and J. R. Regnard.
Neutron and X-ray Spectroscopy , Springer, Dordrecht (2006).
G. Bunker.
Introduction to XAFS: A practical guide to X-ray Absorption Fine Structure Spectroscopy , Cambridge University Press, Cambridge (2010).
S. D. Kelly, D. Hesterberg, and B. Ravel in
Methods of Soil Analysis: Part 5, Mineralogical Methods , Ed. A. L. Urely and R. Drees, Soil Science Society of America Book Series, Madison (2008).
Receive real-time job alerts and never miss the right job again
Source:
OpenStax, Physical methods in chemistry and nano science. OpenStax CNX. May 05, 2015 Download for free at http://legacy.cnx.org/content/col10699/1.21
Google Play and the Google Play logo are trademarks of Google Inc.
Notification Switch
Would you like to follow the 'Physical methods in chemistry and nano science' conversation and receive update notifications?